Thailand Tooth Extraction Procedures for Patients With Impacted Teeth
Thailand Tooth Extraction Procedures for Patients With Impacted Teeth
Thailand Tooth Extraction Procedures for Patients With Impacted Teeth
If you’re dealing with an impacted tooth in Thailand—often a wisdom tooth that hasn’t come through properly—you’ll find the process straightforward, affordable, and well-organised. Whether you’re an expat settled in Bangkok or a traveller passing through Chiang Mai or Phuket, clinics here are used to treating both locals and international patients. Here’s how impacted tooth extraction works in Thailand, from the first consultation to recovery at home.
What “impacted” means and common signs
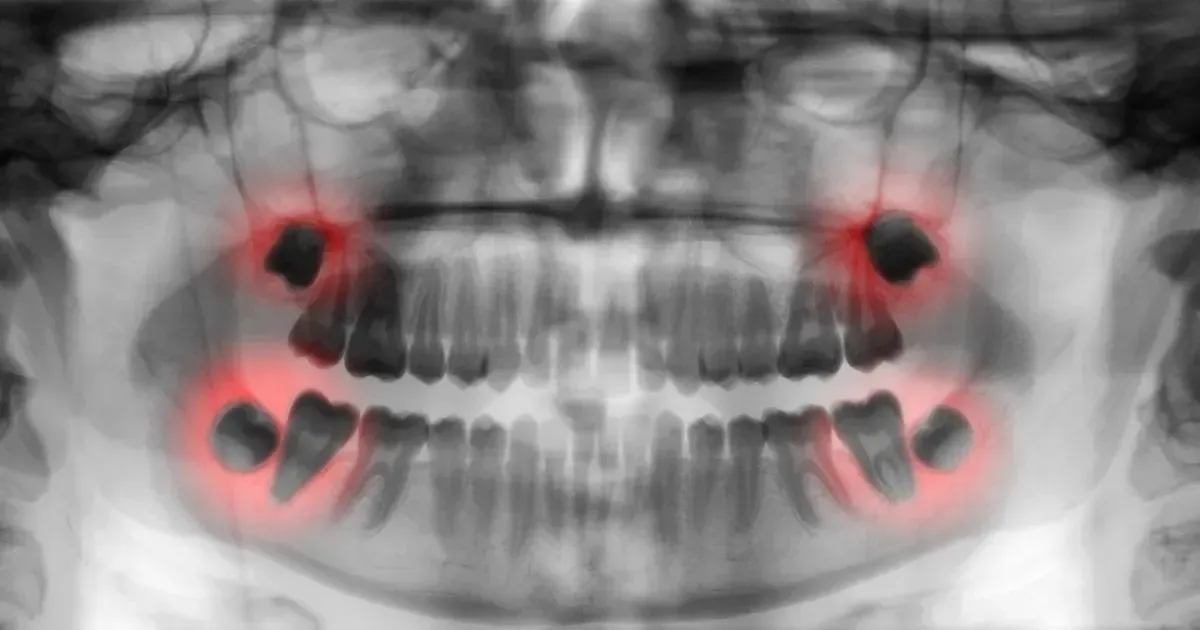
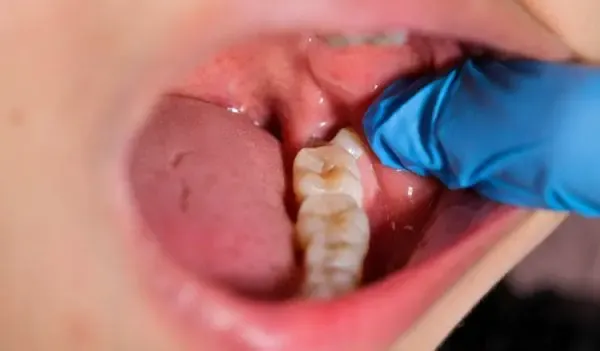
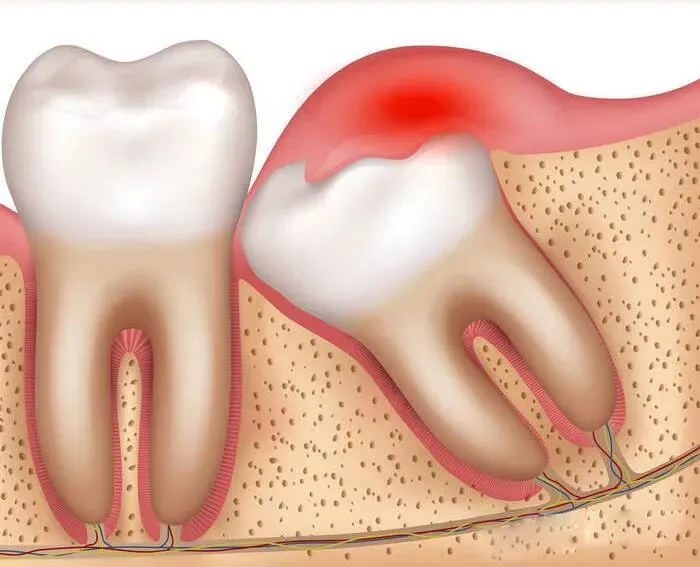
An impacted tooth is a tooth that can’t erupt normally because it’s trapped under the gum or bone, or it’s growing at an angle. Wisdom teeth are the usual culprits. Common signs include jaw pain or pressure, swollen or bleeding gums at the back, bad breath, headaches, or food trapping that causes gum infection. If you have recurring discomfort near your back molars, it’s worth booking a check-up before it flares up.
Where to go: public hospital vs private clinic
- Public hospitals and university dental faculties: Lower fees, longer queues. Ideal if you’re budget-focused and can wait. Many dentists speak English, especially in teaching hospitals.
- Private dental clinics and hospital dental centres: Faster appointments, extended hours (many open evenings and weekends), and more sedation options. You’ll find English-speaking dentists easily in Bangkok, Chiang Mai, Phuket, Pattaya, and Samui.
Booking and costs
Most clinics accept bookings via phone, Facebook page, or Line. Walk-in is possible, but you may wait. Expect to bring your passport (or Thai ID), any medical list, and allergy details.
Indicative fees (can vary by case):
- Consultation and panoramic X‑ray: 500–1,500 THB
- CBCT 3D scan if needed: 1,500–3,500 THB
- Simple extraction (non-impacted): 800–2,500 THB
- Surgical extraction for impacted wisdom tooth: 5,000–15,000 THB per tooth in private settings; public hospitals may be lower
Most places accept cash, card, and QR PromptPay. If you have international insurance, check if your plan covers dental surgery; some clinics can provide invoices for claims.
Your first visit: assessment and planning
1) History and exam: The dentist will ask about pain, swelling, trismus (jaw stiffness), fever, medications, and smoking. They’ll check your bite and gum health.
2) Imaging: A panoramic X-ray is standard. For complicated root positions—close to the nerve or the sinus—a CBCT 3D scan may be recommended to map the anatomy safely.
3) Discussion and consent: You’ll get a treatment plan, costs, and options (extract one tooth or multiple in sessions). The dentist will explain risks like dry socket, infection, temporary numbness (especially with lower wisdom teeth near the inferior alveolar nerve), or sinus exposure for upper molars.
4) Scheduling: Many clinics can do same-day surgery for straightforward cases. If IV sedation is planned, you’ll usually be asked to fast for 6–8 hours and arrange a companion.
Anaesthesia and sedation options
- Local anaesthesia: Most common. You’ll be fully awake, with the area numbed.
- Oral or IV sedation: Available in some private clinics and hospitals for anxious patients or complex cases. You’ll feel drowsy; plan to go home with a friend and rest the day.
- General anaesthesia: Rare, reserved for special cases in hospital settings.
How the extraction is done
1) Numbing and preparation: The area is disinfected; you’ll feel pressure but not sharp pain. If you feel pain, raise your hand—Thai dentists are very accommodati
ng about topping up anaesthetic.
2) Incision and access: For impacted teeth, a small gum flap is opened. Sometimes a bit of bone is removed to reach the tooth.
3) Sectioning: The tooth may be divided into pieces to remove it safely and protect surrounding structures.
4) Removal and cleaning: The socket is cleaned, any infection flushed out, and bone edges smoothed. Stitches (often dissolvable) are placed.
5) Gauze and instructions: You’ll bite on gauze for 30–60 minutes to control bleeding.
Time on the chair ranges from 20 to 60 minutes per tooth, depending on complexity.
Aftercare you can expect in Thailand
You’ll usually receive written instructions in English and Thai, plus a Line contact for questions. Common advice includes:
- Control bleeding: Bite on fresh gauze for 30 minutes if oozing continues. A small amount of blood-tinged saliva is okay.
- Pain control: Paracetamol or ibuprofen as prescribed. Avoid aspirin. If antibiotics are prescribed, finish the course.
- Cold then warm: Ice pack 15 minutes on/off for the first 24–48 hours. Switch to warm compresses from day three if stiffness persists.
- Mouth care: No vigorous rinsing on day one. From day two, rinse gently with warm salt water after meals. Continue normal brushing but avoid the surgical site.
- Eating: Choose soft, cool foods—jok (rice porridge), yogurt, smoothies (no straw), mashed banana, scrambled eggs, soft tofu, soups that are warm not hot. Avoid spicy, very hot, crunchy, or sticky foods for a few days.
- No straw, smoking, or alcohol: For at least 72 hours to lower the risk of dry socket.
- Activity: Take it easy for 24–48 hours. Light walking is fine; skip the gym and sauna.
- Stitches: Dissolvable stitches fall out in 1–2 weeks. If non-dissolving, you’ll be booked for removal in 7–10 days.
Normal healing timeline
- Day 1–2: Swelling and mild bleeding. Swelling often peaks at 48 hours.
- Day 3–5: Discomfort reduces; you can move the jaw more.
- Day 7–10: Stitches dissolve or are removed; most people feel normal.
- Full socket healing continues for several weeks, but day-to-day life is usually fine after the first few days.
Red flags—contact the clinic if you notice:
- Severe pain after day three (possible dry socket)
- Fever, foul taste, increasing swelling, or pus
- Numbness that doesn’t improve after a few days
- Persistent heavy bleeding
Tips for travellers and expats
- Don’t schedule island-hopping or trekking immediately after surgery. Give yourself 3–5 days for recovery.
- Flying is generally fine after 24 hours for straightforward cases, but avoid scuba diving for at least a week.
- If you plan multiple extractions, discuss staging vs doing them in one visit.
- Keep your dentist’s Line or WhatsApp handy—most clinics reply quickly during working hours.
Why many patients choose Thailand
Dentists in Thailand are well-trained, often with overseas qualifications. Clinics use modern imaging, strict sterilisation, and transparent pricing. English-speaking staff are common in major cities, and appointment times are flexible—weekday evenings and weekend slots are easy to find. If you prefer a female dentist or an oral surgeon, just mention it when booking; clinics are happy to arrange.
Bottom line
Impacted tooth extraction in Thailand is safe, efficient, and cost-effective when handled by a qualified dentist or oral surgeon. Start with an X-ray-based assessment, understand your options, and follow aftercare closely. With the right clinic and a few days of rest, you’ll be back to your routine—and your best Thai smile—very soon.